What Should You Do if Your Circuit Board Is Failing?
First and foremost, you must identify the root cause of your circuit board’s failure. Circuit boards may fail over time, so you may need to look for certain red flags to prepare for the worst.
You will need a VI instrument to identify the cause of the issue. The unidentified pin count will also need to be tested via the alternating current. You must then find the exact location of the issue.
Next, you have to pinpoint the issue at a microscopic level to identify the troubling elements. You must then extract the faulty component from the circuit board and replace it with a new replacement part. Below is a full breakdown of how to repair damaged or failing circuit boards.
How to Fix Failing Circuit Boards
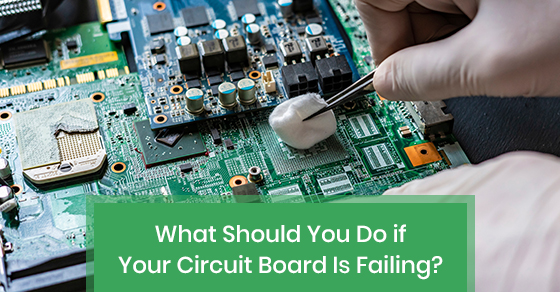
First, use some isopropyl alcohol to clean the area of the board that is failing. Compressed air will then need to be used to dry away the isopropyl alcohol.
Next, inspect the pre-existing pad that is causing the issue. To do so, you can simply use an Exacto knife to peel it off. Just remember to be gentle to prevent additional damage to the circuit board.
In some cases, you may notice some burned laminate. If this applies to your circuit board, then you have to remove it before you proceed. Simply remove the laminate that has made its way around the pad before moving forward.
A lingering solder mask will also be an issue that you may come across. If you notice any lingering solder mask on the unit's conductor, you can remove it with a dental pick.
Then, clean the area using some isopropyl alcohol. Once you have wiped the area, dry it off with a canister of compressed air. If you do not have a canister of compressed air handy, you can use a piece of cloth. However, the cloth must not have any lint on it.
Once you have the proper solder alloy in place, you can get the conductor ready. The area will need to be prepared carefully, as you will be placing the replacement component there.
You have several choices for the circuit frame. Examine the area carefully and then pick the appropriate circuit frame. Remove your choice from the frame using a small knife, such as a pocket knife.
Now, you will need to prepare the new conductor/pad. Using a suitably alloyed solder, cover the spot on the brand new conductor facing the former trace. Afterwards, prepare your epoxy. The epoxy will only last for roughly an hour, so you should only prepare small portions at a time.
Once you are ready, apply the mixture to your circuit board. If time is of the essence, then you can accelerate the bonding process by placing the board in open air. Another option is to cure the affixed components in an oven.
Next, use some Kapton tape to insert your new conductor into place. The final step consists of holding and drying. Begin by clamping the pad in its place for the amount of time needed to cure it.
Remove the clamp after the curing process is complete. We strongly recommend you perform a quick inspection of the electronic continuity. We would also suggest that you place a small amount of solder mask around the edges of the pad and then wait for it to dry. The solder mask will help provide some additional strength to the circuit board that may prove useful in the not too distant future.
Common Circuit Board Issues to Look For
During the fabrication process of a circuit board, slivers of copper or solder mask may form. These slivers may cause your circuit board to fail. For instance, they may cause the plating to be exposed. When this happens, the functionality of the board may become corrupted.
In some cases, a circuit board may be cut too narrowly or too widely. Either scenario may cause wedges to form. Slivers may also affix two different copper sections, which may lead to the lifespan of your board being reduced significantly.
Acid traps are another fairly common issue to be wary of. Acid can be trapped at very narrow angles in a circuit when the unit is undergoing its etching phase. Essentially, the acid ends up being held longer than necessary due to the angles of the acid traps. The acid may also severely damage the circuit, rendering it inoperable.
The main cause of acid traps are oversights that take place during the production of the circuit board. Acid traps can lead to serious issues down the line, so they should be avoided whenever possible.
Starved thermals are yet another issue. Thermals are necessary as they help disperse heat around the pads. However, they are sometimes applied inconsistently, which may cause connectivity problems in due time.
The heat transference process between the planes and the pads is stalled drastically when the thermals are insufficient. The result is that it will become next to impossible to solder a board as intended. To prevent overheating, experts must be dispatched to diagnose and rectify starved thermal issues.
The Circuits Central Difference
If you would like to learn more about circuit boards in Toronto, or need repair or troubleshooting assistance, then please visit Circuits Central at our website. We specialize in hardware design and design support. You can also call us at 888-821-7746 if you would like to discuss your circuit board issues over the phone.